In the last tutorial, we learned how to add nodes and providing input. You define x and y value to create a point. You can’t place an element by giving coordinates, but you can do that with Dynamo easily. We use the point we created in the last tutorial as a reference for our column.
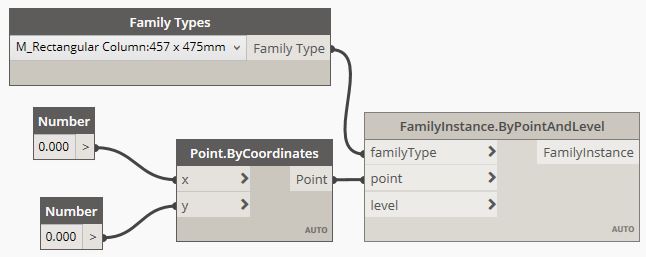
We want to place a family instance to our project. Expand the Dynamo library, under Revit, Elements, FamilyInstance. You can see that there are several nodes to place a family instance. Move your mouse pointer above a node. You can see the tooltip that describe the method of each node. Click ByPointAndLevel.

This node needs three inputs:
- The family types that you want to place.
- The point as the reference.
- The level as the reference.
Point
We already have a point in the last tutorial. Use it as the reference point.

Family Type
You need to provide family type data type as the input. The easiest way is by using the Family Type selection node. You can find it in library under Revit, Selection, Family Types.

In that node, select a column family type. The family type names in the list might be different with yours.

Connect the nodes using wire.

Level
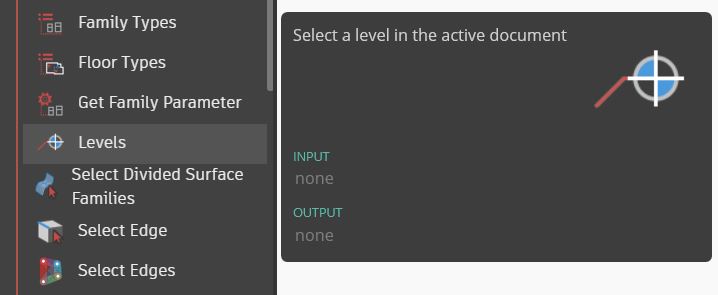
The last data you need to provide is the level for this instance. You can find the Levels node in the library under Revit, Selection, Levels.

Similar to the Family Types node, you can select a level from the drop down list. Select Level 1 and connect the node to the Family Instance node.

The Dynamo definition is complete. You can see the column in the project now. Change the x

You created a simple program to place an instance to your Revit project. However, recreating the program every time you need to place an element won’t be effective.
In the next tutorial, you will learn how to prepare the program for Dynamo Player. Dynamo player allows you to share and use the program without opening Dynamo.
